Pages

Friday, May 31, 2013

The Bib Series: The Finished Product


Alright, let's finish this project up, shall we?  I've already gone through the first two stages of this project.  First, I demonstrated how I constructed the face of the panda using a technique called applique, as well as some light embroidery for the mouth.  Second, I demonstrated how to make homemade bias tape for the border of the bib.  Now that we have all the pieces ready to go, it's time to construct the finishing touches.

At this point, the face of the panda has been attached to the front part of the bib that we have cut out like this:


Line up the two sides of the bib, wrong sides together, and pin to keep in place.  Cut through the top part of the bib like this:


Now it's time to begin attaching the bias tape.  Disclaimer:  This is NOT the proper way to attach bias tape.  Traditionally, you would sew on one raw edge of the bias tape with the raw edge of your project, and then top-stitch the rest of the bias tape on.  The first bib I made, I attempted this and it was a MAJOR failure!  This is such a small, curvy project, that it's damn near impossible to attach the bias tape in the traditional way.  I've found that if I simply pin the bias tape in place and top stitch once, it's much easier and less prone to errors.  The only downside to this method is it's a little harder to attach the two ends together at the end, which I'll get to.  He, I've begun attaching the bias tape around the edges of the bib.


Notice how I handled the corners of the neck area.  I've pinned most of the bias tape on, but haven't finished pinning the corners down.  When doing this, you can gently pull the bias tape (it has a little stretch) to make the curves lay more flat.


Now let's work on getting the end of the bias tape pinned down.  You want to leave yourself about 2-3 inches of extra bias tape that will overlap with where you started.  You can see how much I have left here.  Take the bias tape that will cover or go over the other side of the bias tape and open up the folds.  Make a small fold on the raw edge of the open bias tape that is parallel with the edge, shown here:


Now here's the tricky part:  Refold the bias tape along it's previous folds with the new fold still intact.  Now you want to "cover" the other edge of the bias tape, tucking the folds under the other bias tape.  This is shown here:


This may take some finagling and adjustment, but eventually, you'll want to get everything pinned down and lined up so there's no slack in the bias tape, and there are no raw edges showing.  It will look something like this:


Now for the corners.  Fold and tuck the corners on both sides of the bias tape so they lay flat.  Try to make the front and back as symmetrical as possible, so when you sew it down it will mostly line up with both sides.    I've found that pinning separately on both sides is the best way to get it to lie flat, otherwise you're attempting to pin through too many layers of fabric, and that will be difficult to sew later.  This is how I pinned down the corners:


Now it's time to top-stitch the bias tape down along the entire length of the border of the bib.  Start on the corners, as those are the places where it is going to be the most difficult to sew.  When going over the corners, I'll take my foot off the pedal and manually move the needle along with the wheel to get through the many layers of the fabric.  I've found that this makes this process more precise, as well as decreasing the likelihood of errors (and believe me, I've had many!)  I also do this because my sewing machine is crappy and not very powerful and is a big baby and goes "NOPE NOPE NOPE" when I try to sew through that many layers.


Continue top-stitching around the bias tape.  Make sure you keep the spacing as even as possible.  The kind of spacing I try to maintain is about 1/8" of an inch from the inside edge, and 3/8" from the outside edge of the bias tape.  You can see this spacing below.   Two reasons for this:  You want to make sure your stitches are going through the bias tape AND the face of the bib, so if you stitch too close to the outside edge, you might not get all the layers (which depends on the quality of your pinning).  Also, if you stitch too close to the inside edge, you may actually stitch off the edge of the bias tape on the back. (also dependent on pinning)  This last point would not be an issue if we were doing bias tape the traditional way, but WHAT CAN YA DO?


Yayyyy, we've sewed on the bias tape!


Now, I've simply attached velcro strips by hand sewing them.  Make sure the soft part of the velcro is the one that is facing toward the baby's neck!


Voila!  The finished product!  Ready for baby!


Thanks so much for visiting. I really appreciate everyone who reads and comments. If you like what you've seen here, please follow me on Facebook and Pinterest to receive updates.

facebook-like-me-button1         Follow Me on Pinterest


Friday, May 17, 2013

The Bib Series: Make your own Bias Tape


Hey everyone!  It's been awhile.  Please don't be mad.  But, hey!  Don't say I didn't warn you in the last post on... March 1...that I had a lot of things going on lately.  Things that have happened since March 1st:  I defended my Master's Thesis (which means I get a new acronym after my name, M.S.), I finished up the semester with a butt-load of things due (numerous paper, numerous presentations), and attempting to finish up my year-long internship/practicum (only two more weeks!).  In addition, I have been dealing with a few health issues with my cat, Oliver.   I'll comment on what's been going on with Oliver later, as I'd like to keep this post light.

However, now the summer is almost here, and my schedule is rapidly opening up to the MANY things I have been planning!  Here's a little preview of what's on the agenda:
  • Garden 2013, already in full swing.
  • Part 3 of The Bib Series:  The Finished Product
  • The Bob Dylan T-Shirt Quilt Project
  • Oliver:  Last Days
  • I plan to practice my photography this summer, which will probably include many sights around the Chicago area.  
  • More recipes and tutorials!
So, this post is so spectacularly late, that the baby I made this panda bib for is already born, and is now a month and a half old!  Little Elliette has already been spitting up and vomiting all over her bibs for a month and a half already!  So let's get down to it.  When we left off, we had finished our applique, and were left with two sides (the front and the back) of the bib.  

At this point, we need to use one of the most versatile things in the sewing world:  Bias Tape.  Bias tape is not TAPE, it's basically just fabric that has been cut at a 45° angle and folded into quarters.  This can be purchased at any fabric store, usually near the thread.  It is so versatile, because it can be used to "edge" projects to cover up raw ends of fabric, instead of other traditional methods.  Plus, it's really CUTE.  However, what I found is that the selection of pre-made bias tape offered in stores tend to be really bland and kind of expensive.  A few years ago, I found that I can make my own bias tape rather easily, which means that I can have any pattern I want!!  

For a few years, when it came to folding and pressing the edges, I would "eyeball" it, which tended to take a while.  I looked in fabric stores for bias tape guides which would facilitate this process, but they were all pretty expensive as well.  THAT'S when I found this printable bias tape maker at The Scientific Seamstress which literally changed my life.  It was free, and it really works!  So let's get to it then:

Materials:
Cutting Mat
Rotary Cutter
Yard stick, or Ruler
Fabric of your choice

Luckily, cutting mats have a bias line already on them, which makes this process very easy if you have these tools.  Here is the line that I'm point to which will cut your fabric on a 45° angle.


I've chosen this beautiful white eyelet fabric to complement the main bib fabric.  I've started with one bias-cut shown here:


For the next step you'll have to decide how wide you want your finished bias tape to be.  The fabric will be folded into quarters (which we'll see), so you'll need to cut your fabric four times as wide as you want the finished bias tape to be.  I'm looking to use 1/2" finished bias tape, so I am cutting my strips 2" wide.  BONUS, my mom gave me these awesome clear quilter's measuring stick thingies from her days as a quilter.  You can see that this one is exactly 2" wide, which makes it even easier to cut and measure.


Here is the finished strip.  Cut a few of these to make as much bias tape as you need.


I've cut three from my fabric, which will be sufficient enough for use on this bib.


Now this part can get a little tricky.  You'll want to pin the pieces of bias tape together on a 90° angle like this.  I like the line up the original straight edge of the fabric, which will make a perfect 90° angle.


Now, to make a perfect sewing edge, mark where you will sew.  I've lost my small ruler, so I'm just using the back of gift card for this.  You'll want to mark a line that goes from one corner/edge of the overlapping fabric to the other like this:


Make sense?


Here we go!  Let's sew that bad boy up, following the line you just drew.


Here's the fabric after sewing.  You'll want to press (iron) the tabs apart and trim the edges that are peeking from the back.


Here it is after pressing and trimming.  Repeat this process with the other pieces of fabric that you cut out, making sure that you sew each one on the same side.


Now it's time to pull out your bias-tape maker from the Scientific Seamstress that you've printed and assembled!  (You don't need this to move forward, it just helps)


Thread your bias tape through the large side of the paper, and it will fold quite nicely as you pull it through (with a little help from you).  Have your iron ready to press the folds down as they come through the folder.


You'll end up with something that looks like this:


Now you'll have to fold the bias tape yourself.  Simply fold the tape in half, and press as you go, with the previous folds on the inside of the new fold.


Like this:


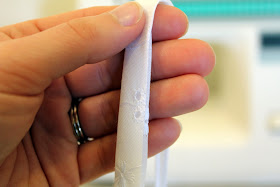
When you finish, this is what the finished product will look like up close.


Now you're ready to use your new homemade bias tape!!  Stay tuned for part 3 of the Bib Series, where we attach the bias tape and finish up!


Thanks so much for visiting. I really appreciate everyone who reads and comments. If you like what you've seen here, please follow me on Facebook and Pinterest to receive updates.

facebook-like-me-button1         Follow Me on Pinterest