The ultimate good for you "snack", can be really expensive. Especially if you're going for Greek yogurt, those things are usually $1.50 or more each! Last summer I decided to try to make my own yogurt, and to my surprise it was insanely easy. In a nutshell: Heat some milk, let it cool, mix in a starter, let it incubate, strain. DONE. And did you know that the only difference between Greek yogurt and regular yogurt is that you strain the "whey" out of it? WHO KNEW?! Also, once you've made one batch of yogurt, you can keep using your own yogurt as the starter. It's a sort of self-perpetuating cycle of deliciousness.
A couple of disclaimers:
- You cannot use "ultra-pasteurized" milk to make yogurt. Ultra pasteurized milk has literally all the bacteria removed. Yogurt making is dependent upon bacteria to create the texture and the finished product. If you use ultra-pasteurized milk, you will not get yogurt. Regular pasteurized milk is ok. I just use the regular old milk from the grocery store.
- You can use organic milk, just not the ultra-pasteurized kind.
- The fresher the milk, the fresher the yogurt and the longer it will last, so make sure you've got the freshest milk possible
- Make sure that the starter you get from the store (it's just a regular yogurt) is labeled that it contains live active cultures. If you use a yogurt starter with no active cultures, you will not get yogurt.
- You're going to need some sort of method to strain the yogurt. A bouillon strainer is great for this process, but they are expensive and I don't have one. I typically use a regular strainer lined with 2-4 layers of cheesecloth. You can also just JUST cheesecloth, clipped to the side of the bowl. We'll get to that.
So gather your ingredients and utensils, and let's do this!
Homemade Greek Yogurt
Yield: 2 cups of yogurt
4 cups of milk (or a half gallon)
2-3 tbsp plain Greek yogurt
Utensils:
Thermometer
Strainer + Cheesecloth
Double boiler or thick bottomed pan
Whisk
Extra bowl
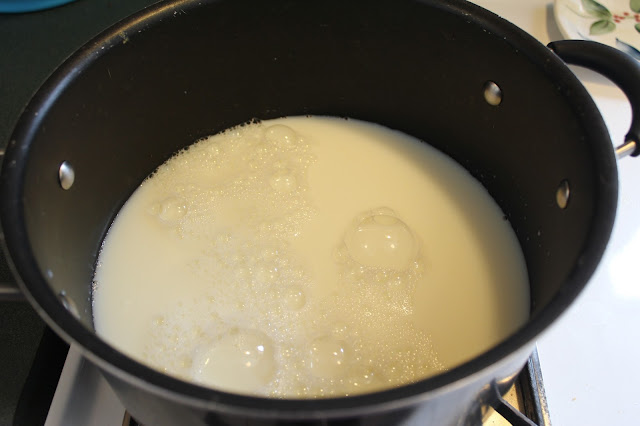
Start by pouring the milk into your pan. Just to let you know, you don't have to use a pan this big.
Heat over medium heat until you reach 180 degrees F, whisking and stirring the entire time so the milk doesn't burn. Use your thermometer to do this.
When the milk has reached 180 degrees, remove from heat and pour into another bowl. Leave on the counter and let cool to 105-115 degrees.
Ok, for your starter, again, make sure that your yogurt has live active cultures. It's best to use plain, unsweetened green yogurt as your starter, but I was lazy and got this regular Yoplait instead. It still worked, but not as good as it could have. (Notice where it says "active cultures") When your milk reaches about 105-115 degrees, mix in 2-3 tbsp yogurt. Make sure you don't add more than that, it could make your yogurt too tart. Cover your yogurt with a towel.
Now, you need to incubate your yogurt. If you can set your oven to 100 degrees, that works great. Yogurt will incubate successfully at temperatures between 85°F and 100°F, although the lower temperatures will take a longer time. Temperatures higher than 100°F will result in a yogurt that looks curdled with an uneven texture. My oven does not have a digital setting and the lowest setting is 200 degrees. But the pilot light provides enough warmth to incubate my yogurt, so I'll turn on the oven for about 5 minutes, turn it off, and it's enough to incubate for 8 hours.
You can start checking the consistency of the yogurt at 5-6 hours, and it should start to harden. Typically yogurt incubation should be around 7 hours, but it can incubate for longer. Try to not incubate for over 8 hours, because the yogurt will become tart. After incubation, here's the yogurt! At this stage, you can finish, if you simply want regular yogurt. If you want Greek yogurt, you'll need to strain it.
Here's the method I use to strain my yogurt. A regular strainer with a couple layers of cheesecloth. Make sure to dampen the cheesecloth before use.
Pour your yogurt in, cover with your towel and move to the refrigerator.
After a few hours, here is the result! You can see the whey at the bottom of the bowl.
A closer look at the whey. Some people use this to cook with, but I haven't ever. Discard if you have no use for it.
Empty the yogurt into a storage container.
Here we go! We are left with roughly two cups of yogurt. Sweeten with honey or sugar if you want. You can even use jam as your sweetener. I enjoy fresh berries in mine.
Enjoy! If you liked this, please let me know in the comments!


Laurie, I have made your yogurt and it is easy to make and delicious. Again your pictures in your tutorial make the process look so easy and I always end up thinking..."I have to make that!"
ReplyDeleteThanks mom :)
DeleteVery nice photos! That new camera is doing wonders for you!
ReplyDelete