Showing posts with label Crafts. Show all posts

Thursday, August 1, 2013

The Bob Dylan Quilt Series: The Last Step


So last week I began hand-stitching the border in place, and I am happy to say that I've finished!  It's definitely relaxing to do while watching some TV that doesn't require constant attention, such as a documentary on Netflix.  I sat through almost the entirety of Ken Burns' Prohibition while working on the border.  Here's a quick shot of the front and back of one of the corners:


And here's a look at the original seam where the bias tape edges were put together:


Looking pretty good so far!  Technically, I could probably stop at this point.  BUT.  This is a quilt, I'm gonna finish it like a quilt and make it as good as possible.  Now comes the actual "quilting" portion of the project.  Basically, front and back of this blanket/quilt are not connected anywhere but the border.  Quilting solves this problem and prevents shifting of the material in the middle.  There are a number of options here:

1) You have tons of free time to hand-stitch awesome quilting patterns all over the blanket (not staying on the seams)
2) You could attempt to machine-stitch patterns all over the blanket (at your own risk)
3) You could pay someone to do this for you.
4) You could make this into a "tie" quilt where you tie little pieces of the quilt together in strategic places. (I think this as more for baby blankets, am I wrong?)
5) You could machine-stitch "in the ditch", meaning along the existing seams on the front.
6) You can hand-stitch "in the ditch" (in the seams).

I'm goin' with #6 you guys.  My reasons for this is that I've never done it before (and I'd like to try), I think it'll create a nice looking finished product, and while I may not have a LOT of time on my hands at this point, I'm pretty fast at stitching and don't think it'll take too long.  So far I've stitched across two seams, and it's going fairly well.

A few issues:  I don't have a quilt stabilizer thingy to stretch the quilt out nicely so I can do this.  I'm basically stitching this with it in my lap.  Due to the difficulty in placing each and every stitch perfectly on both sides (I'd have to keep flippin' the dang thing over!), I'm working by only looking at the stitching on the top of the quilt and using my hands (below) and my eyes (on top) to estimate the stitches coming up from the bottom layer.  So, what does this mean?  The stitching on the front will look perfect, and the stitching on the back will be less than perfect.

By the way, I really hate this.  IT'S NOT PERFECT?  AAAAAAAHHHHHCK!

Here, take a look.  Below, the top seam has been quilted.  Hard to see, right?  You can tell compared to the bottom seam, which hasn't been quilted yet.


However, here's the back of that seam.  Straight, mostly uniform, but some of the stitches are a little wonky.  AAAAAACK.  If I had machine stitched, the back would look perfect, but it would be HARD to get the front to look perfect.  At this point, because I would rather the front look perfect with a little back issues, I've gotta just go with it.  This is the side that will be against the person getting warm anyways!!!


One thing to note is how to hide the edges of the thread at the beginning.  I had to call my mom on this one:

"You make a small knot in the thread, smaller than you normally would, about one or two knots.  When you start your stitch you make sure the needle goes through the batting.  Give it a small little tug so it goes into the middle of the quilt, and gets stuck on the batting and doesn't come out the other side."

Guys, I was amazed.  This woman has a wealth of handicrafts knowledge.

Oh, and to hide the thread at the end of the hand-stitched seam:

1) Stitch to the end
2) Make one last tiiiiny stitch as close to under the border as you can, but don't pull it all the way through
3) Loop your needle through the loop of thread two times
4) Now pull it tight.
5) Stitch into the middle of the quilt and out the very edge of the quilt (to hide the little tail of thread) & cut the thread at the edge.

I'll work on getting a video or pictures up on this process, because it can be confusing!  And now I'm off do do some hand-quilting. ;)

Make sure to check back next week, I'll be posting updates about this project!  If you are unsure of anything I'm doing here, please let me know and I'll clarify.  And as always, Thanks so much for visiting. I really appreciate everyone who reads and comments. If you like what you've seen here, please follow me on Facebook and Pinterest to receive updates.

facebook-like-me-button1         Follow Me on Pinterest

Wednesday, July 24, 2013

The Bob Dylan Quilt Series: Batting & Border


Batting Part Two!!

I had to take a hiatus from the quilt for a couple weeks to deliberate about the batting I bought.  It just didn't seem right to me and I had to consult with the "client" (HI LORI!) about it.  I had chosen polyester fusible batting, but it didn't lay flat, it was too thick, and just wasn't right.  After some consideration, I decided to head back to Joann's and pick up some (as thin as possible) cotton batting.  This is supposed to be a light blanket, and I didn't want it to be overwhelmingly warm, but can I tell you?  It is REALLY hard to find the super thin stuff.  I know there is batting even thinner than the replacement batting I bought, but I couldn't find any.  I went ahead and prewashed the cotton batting (it will shrink) by soaking it in hot water for 20 minutes, then air drying it on low heat.  I then replaced the old batting with the new, cotton batting.  Aaand we're ready to go again.


To construct the border, I made my own bias tape from the same gray fabric as the back and front panels.  I wanted to have a finished bias tape of ½”, so I cut the fabric into strips 2 inches wide at a 45 degree angle (on the bias).  Folding and ironing the two sides into the middle, and then folding it again in half, you have a finished product that looks like this:


You can also buy factory-made bias tape for this process (but then it may be a different color!)  For more detailed instructions on how to construct bias tape, please visit my previous post on bias tape from my Bib Series.

Next it's time to attach the bias tape around the border.  Start by opening the bias tape up and pinning it around the top of the quilt with right sides together.  You'll want to fold the beginning of the bias tape down to make a little triangle.  OF COURSE I forgot to take a picture of it, so I lovingly recreated it for you:


Keep pinning around the quilt.  At the corners, bring the bias tape all the way to the edge, fold it, and continue pinning on the other edge.  It looks like this:


Here's a closer look.  You'll have a little triangle of fabric.


When you get back to the beginning, pin over the other bias tape reserving a couple extra inches of bias tape.


Now it’s time to sew!  Generally, you’ll want to sew on the ½” fold from the raw edge.  However, since we’re working with homemade bias tape and not factory made, here’s a little extra detail.  Fun Fact:  Factory made bias tape has a short fold and a long fold.  The short fold is sewed on first, and the long fold covers the whole thing.  Now MY bias tape is completely equal on both sides.  Therefore, in order for the bias tape to cover the thread I’m sewing on first, I’m going to sew juuuust inside the ½” fold.  See?


Here's a pic of it without the annotations:


To deal with the corners, remember how we had a little triangle of fabric just dangling there in space?  The rule of thumb here is DON'T SEW THAT.  We want that triangle to keep on danglin'.  So when sewing, just go riiiiight up to where the triangle of fabric sticks up, like this:


Then stop, back stitch, cut the thread, and start again on the other side of the triangle.  Understand?


See here's me squishing the dangly triangle down, with the sewn part underneath it.


Here's a pic of the real thing:  (You can kinda see it)


Continue sewing until you go all around the quilt.

After sewing all the way around the border, now what we do is fold the bias tape into it's original shape, which covers the edge of the quilt.  Pin all the way around the quilt, making sure that the thread from the line you just sewed is covered.  Here's a few pictures that demonstrate this process.


This is the edge of the bias tape where we put that little triangle fold at the very beginning.  By pinning down that fabric in the shape we did, we get this attractive little seam where the two edges of the bias tape meet.


Now all we have to do is attach the other side of the border.  There are two ways of doing this. 1) You could top stitch the bias tape all around the border or 2) hand-sew the other edge of the bias tape on without bring the needle to the front of the quilt.  I am opting for #2, because I like how you can't see the seam looks without the top-stitching, and I find it's more precise and neat.  Begin by bringing the needle through the back of the bias tape so you can hide the beginning of the thread.


Sew by bringing the needle through ONLY the back layer of fabric, and through the edge of the bias tape.


Now continue doing this until you get the entire way around!  So I'm gonna go do this now, it's going to take a while! :)  If I get this done next week, I'll be beginning on the last step: QUILTING.  We are so close, I can taste it! 

Make sure to check back weekly on Wednesdays, I'll be posting updates about this project!  If you are unsure of anything I'm doing here, please let me know and I'll clarify.  And as always, Thanks so much for visiting. I really appreciate everyone who reads and comments. If you like what you've seen here, please follow me on Facebook and Pinterest to receive updates.

Wednesday, July 10, 2013

The Bob Dylan Quilt Series: Batting


Now that I'm off vacation, it's time to resume the Bob Dylan quilt series! When we last left off, we had finished assembling the front of the quilt, and cutting the back.  Now it's time to put them together with batting.  I put the front and back together without batting just to cut any edges that are off so the front and back are perfectly the same size.


Now here's my batting.  Soooo, I ended up buying fusible batting, which I kind of regret.  It's all stiff and the wrinkles were hard to remove.  I ended up having to steam and stretch it the best I could with my iron (without touching the iron to it!!!)


Here's the batting after doing the best I could to get the wrinkles out.


Now put the batting between the front and back pieces.  Make sure to pin it so the front and back are as lined back up as possible.


Now trim the batting.  And Voila!!  We are ready for the next step!


Coming up  next week, I will assemble the bias tape and attack the border!

Make sure to check back weekly on Wednesdays, I'll be posting updates about this project!  And as always, Thanks so much for visiting. I really appreciate everyone who reads and comments. If you like what you've seen here, please follow me on Facebook and Pinterest to receive updates.

facebook-like-me-button1         Follow Me on Pinterest


Wednesday, June 26, 2013

The Bob Dylan Quilt Series: Cutting & Assembly


It's crafting Wednesday again!  Time to see how much progress I've made on the Bob Dylan T-Shirt Quilt.  If you haven't seen the first two installments, Set Up & Prep and Cutting & Interfacing, you might want to see how we got to this point.  Last week, I cut out the t-shirts and interfaced them.  This week I've cut out the complementary gray fabric, and started assembling the front of the quilt.  As always, when making a quilt, there needs to be some alterations in the original plan as you go.  First, there was a substitution in the shirts, as one shirt had a front and a back design that both fit a bit better in the design than another one.  I also had to alter the side pieces of the gray border fabric.  Here is an update of the plan:


Originally, I was going to have the sides be a continuous piece, 1" x 46" (and cut it 2" x 47" for seam allowance).  However, when I was cutting out my fabric which was only 42" wide, I made the executive decision to change the continuous piece to three pieces fit together.  This allowed easier cutting, and saved me a trip to the store to buy more gray fabric!  The notations of the gray fabric and what each should be cut is noted at the top of the plan.  Now I just had to get to it.

So here is my raw fabric.  I did iron this after pre-washing it, I promise!  Not to worry though, this will be ironed many more times, and it doesn't have to be perfect at this stage.  Also, please disregard the ugly carpet.  I said don't look at it!! :)  Now what we have here is fabric that has a factory woven edge (on the right) and the edge that was cut by the lady at Joann's (on the bottom).


We need to make completely sure that we have a right angle, not just by cutting it.  We want a right angle by the actual weave of the fabric.  There is a really easy way to do this.  Simply cut an inch or so into the factory  side of the fabric like so:


Now grab that little tab, and PULL!


Keep pulling!!!  Pull until the fabric until it reaches the other side.  Now, if the fabric peeters out before it gets to the other side, cut a new tab and pull.  You want to pull it until it gets completely to the other side.  This also shows how bad of an angle those fabric ladies actually cut!


Here's a look at the fabric after I did this process.  I did have to cut mine a couple times to get it to pull the entire way across.  Your new raw edge is now squared and a perfect 90 degree angle with the factory edges on the other sides.  The new raw edge will have a little wave to it, and that goes away with the simple press of an iron.


Here's a close up of the edges after ironing.  I've rotated it as well.


Now it's time to cut!  I have my dimensions all planned out on my blueprint (above).  Below, I've started with the top and bottom pieces, measured 41" x 3".  Measuring with the new squared edge, I've made three inch marks to cut along.  Make sure to be as precise as possible with measuring and cutting.


I've cut out and labelled all my pieces.


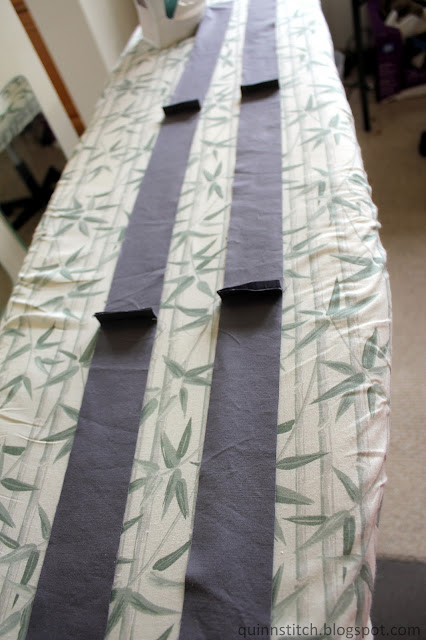
Now I'm going to assemble the side pieces.  I need the final product to be 47" x 2".  Lay the right sides of the fabric together and sew 1/2 of an inch from the edge.  By precise measuring and cutting, and sewing with a 1/2 inch seam allowance, these pieces are perfectly 47" x 2".


Now simply iron down the seams like this.  You'll want to do this with all your seams as you go.


Here are all my pieces laid out, with the sides pre-assembled.


Now it's time to start assembling the rows.  Again, lay the right sides together, and pin the pieces that need to be connected.


Sew with a 1/2 inch seam allowance.


And iron down the seam when finished.  Don't worry if the gray fabric stretches a bit during sewing.  You can see that this happened to the piece I sewed in the picture below.  Simply trim the overlying gray fabric before moving on to sewing the next piece.


Here is the finished first row.  Quick measurements of the gray fabric between the t-shirt panels shows a (mostly) perfect 1" separation of gray fabric between the t-shirts.  Again, this is due to precise measuring, cutting, and sewing.


All three row are assembled!  Now to sew the 2" panel between the rows.  When doing this, be as precise as possible to line up the columns of the t-shirts together.  You can't do this with seams, as there is gray fabric between all the t-shirts.  After you pin, grab a ruler or straight edge and see if the seams somewhat line up along the columns.


Here's a look at what we've got now that the columns are assembled!  A (mostly) perfect 2" border between the rows.  Now onto the border.


One good thing about the seams that are now along the side pieces, is that we can use these seams to line up with the seams of the t-shirts and be SUPER precise!  When you are pinning two seams together, you want to pin the seams exactly where the two pieces meet on both sides.  You can see the front side here, with the pin directly in the seam:


And here's the other side, again, with the pin exactly in the seam!


By doing this, after sewing and pressing, your seam should look PERFECT, and everything should line up like this:


TA DAAAAA!  Here are all the front pieces, assembled!


Coming up this next week, I will be inserting the batting and constructing the border. So make sure to check back weekly on Wednesdays, I'll be posting updates about this project!  And as always, Thanks so much for visiting. I really appreciate everyone who reads and comments. If you like what you've seen here, please follow me on Facebook and Pinterest to receive updates.

facebook-like-me-button1         Follow Me on Pinterest