Sunday, February 10, 2013

How to make: Homemade Greek Yogurt


The ultimate good for you "snack", can be really expensive.  Especially if you're going for Greek yogurt, those things are usually $1.50 or more each!  Last summer I decided to try to make my own yogurt, and to my surprise it was insanely easy.  In a nutshell:  Heat some milk, let it cool, mix in a starter, let it incubate, strain.  DONE.  And did you know that the only difference between Greek yogurt and regular yogurt is that you strain the "whey" out of it?  WHO KNEW?!  Also, once you've made one batch of yogurt, you can keep using your own yogurt as the starter. It's a sort of self-perpetuating cycle of deliciousness.

A couple of disclaimers:

  1. You cannot use "ultra-pasteurized" milk to make yogurt.  Ultra pasteurized milk has literally all the bacteria removed.  Yogurt making is dependent upon bacteria to create the texture and the finished product.  If you use ultra-pasteurized milk, you will not get yogurt.  Regular pasteurized milk is ok.  I just use the regular old milk from the grocery store.
  2. You can use organic milk, just not the ultra-pasteurized kind.
  3. The fresher the milk, the fresher the yogurt and the longer it will last, so make sure you've got the freshest milk possible
  4. Make sure that the starter you get from the store (it's just a regular yogurt) is labeled that it contains live active cultures.  If you use a yogurt starter with no active cultures, you will not get yogurt.
  5. You're going to need some sort of method to strain the yogurt.  A bouillon strainer is great for this process, but they are expensive and I don't have one.  I typically use a regular strainer lined with 2-4 layers of cheesecloth.  You can also just JUST cheesecloth, clipped to the side of the bowl.  We'll get to that.


So gather your ingredients and utensils, and let's do this!

Homemade Greek Yogurt
Yield:  2 cups of yogurt

4 cups of milk (or a half gallon)
2-3 tbsp plain Greek yogurt

Utensils:
Thermometer
Strainer + Cheesecloth
Double boiler or thick bottomed pan
Whisk
Extra bowl

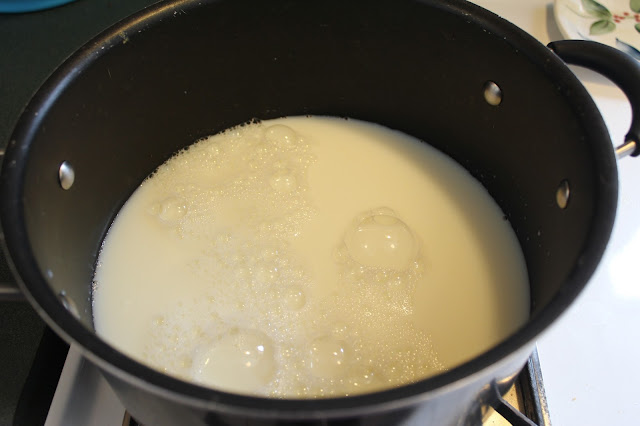
Start by pouring the milk into your pan.  Just to let you know, you don't have to use a pan this big.


Heat over medium heat until you reach 180 degrees F, whisking and stirring the entire time so the milk doesn't burn.  Use your thermometer to do this.


When the milk has reached 180 degrees, remove from heat and pour into another bowl.  Leave on the counter and let cool to 105-115 degrees.


Ok, for your starter, again, make sure that your yogurt has live active cultures.  It's best to use plain, unsweetened green yogurt as your starter, but I was lazy and got this regular Yoplait instead.  It still worked, but not as good as it could have.  (Notice where it says "active cultures")  When your milk reaches about 105-115 degrees, mix in 2-3 tbsp yogurt.  Make sure you don't add more than that, it could make your yogurt too tart.  Cover your yogurt with a towel.


Now, you need to incubate your yogurt.  If you can set your oven to 100 degrees, that works great.  Yogurt will incubate successfully at temperatures between 85°F and 100°F, although the lower temperatures will take a longer time. Temperatures higher than 100°F will result in a yogurt that looks curdled with an uneven texture.  My oven does not have a digital setting and the lowest setting is 200 degrees.  But the pilot light provides enough warmth to incubate my yogurt, so I'll turn on the oven for about 5 minutes, turn it off, and it's enough to incubate for 8 hours.

You can start checking the consistency of the yogurt at 5-6 hours, and it should start to harden.  Typically yogurt incubation should be around 7 hours, but it can incubate for longer.  Try to not incubate for over 8 hours, because the yogurt will become tart.  After incubation, here's the yogurt!  At this stage, you can finish, if you simply want regular yogurt.  If you want Greek yogurt, you'll need to strain it.


Here's the method I use to strain my yogurt.  A regular strainer with a couple layers of cheesecloth.  Make sure to dampen the cheesecloth before use.


Pour your yogurt in, cover with your towel and move to the refrigerator.


After a few hours, here is the result!  You can see the whey at the bottom of the bowl.


A closer look at the whey.  Some people use this to cook with, but I haven't ever.  Discard if you have no use for it.


Empty the yogurt into a storage container.


Here we go!  We are left with roughly two cups of yogurt.  Sweeten with honey or sugar if you want.  You can even use jam as your sweetener.  I enjoy fresh berries in mine.


Enjoy!  If you liked this, please let me know in the comments!


Sunday, February 3, 2013

How to make: Avocado Corn Cakes


Last night I went to a "pot luck" with my classmates, and we were supposed to bring a dish to share.  I had NO idea what I was going to bring about 2 hours before, but luckily I was able to come up with this appetizer on the fly and it was a hit!  I know that I liked it, because it combined many of my favorite flavors.  (Plus I got to use some of my cumin) I also couldn't come up with a fancy name for these, so I settled on "Avocado Corn Cakes".  Any suggestions are welcome!


Avocado Corn Cakes
Yield: 14  Time: 30-45 minutes

For the corn cakes:
1 cup masa corn flour
1 tsp cumin
1 tsp garlic powder
1 tsp onion powder
1/2 tsp paprika
1/4 tsp salt
1 cup water
1-1 1/2 cups corn oil


For the avocado filling:
1 avocado, diced and mashed with a fork
1 tomato, diced
1 tsp cumin
1/4 tsp salt


1 can refried black beans (or pinto beans)
cilantro for garnish

Begin by assembling the corn cake mixture.  Mix the masa, cumin, garlic powder, onion powder, paprika and salt in a bowl.


Add the water and begin to bring together with a fork.


When combined, start by making small balls of the masa mixture


Have some extra masa on a plate so the dough won't stick to the plate or your hands.


Flatten the masa down into a cake or patty with your hands.


In the meantime, heat the corn oil in a pan to 350-375 degrees F.


I used a thermometer to help me with this, because it can get kind of tricky keeping the temperature correct.


Add the corn cakes and cook for ~2-4 minutes per side.  When finished, set on a paper towel to dry.


Begin assembling the avocado topping by mashing up the avocado with a fork.


Add the spices and the tomato, and you're ready to assemble!


Spread the beans on top of the corn cakes like this:


Now dollop some of the avocado mix on top, and garnish with a sprig of cilantro.


Voila!  You're done!  Soooo good!


If you liked this, let me know in the comments!  And don't forget to follow me on Facebook and Twitter!

Saturday, February 2, 2013

How to make: Creamy Chicken & Veggie Fettuccine


A couple days ago I was craving some comfort food.  Seeing the box of Fettuccine in my cupboard, all I was thinking of was a gigantic bowl of Fettuccine Alfredo.  However, I was not in the mood to make my own creamy sauce, so I improved a little on this one.  It turned out really great, too!

This recipe is pretty simple in terms of ingredients.  However, it gets a little difficult with timing the separate ingredients to come together at the end.  It's worth a try though, because it was so tasty.

Gather your ingredients:

Creamy Chicken & Veggie Fettuccine

1 small box of Fettuccine noodles
1 can cream of mushroom soup
1/2 cup milk
1 tsp garlic powder
2 chicken breasts, cut into cubes
1 red pepper, diced
1 orange pepper, diced
1 cup (or more) of broccoli, cut into florets
1/4 cup water
1 tbsp olive oil
pepper, to taste

Prep by dicing your veggies:


Drizzle some olive oil in a pan and cook the chicken on medium heat until cooked through.


In the meantime, get your noodles cooking, taking care to stir frequently so the noodles don't stick together.  When the noodles are cooked, strain and set aside.  Drizzle and mix with olive oil. The olive oil will make sure the noodles do not stick together until the other ingredients are finished cooking.


In another pan, heat some olive oil and add the peppers.  Cook over medium/high heat for about 5-7 minutes or until cooked.


Combine cream of mushroom soup, milk, and garlic powder to the pan with the chicken.  Heat over low and stir until combined.


Add the cooked peppers to the chicken/sauce mixture.


In the same pan that the peppers cooked in, add the broccoli and water.  Cover and cook/steam on high for about 3-4 minutes, or until broccoli is cooked, but still crispy. Take care not to overcook the broccoli.


When the broccoli is finished, add to the chicken/peppers/sauce mixture:


Top this mixture over the Fettuccine on separate plates.  Season with pepper to taste, and enjoy!


If you liked this, let me know in the comments!  And don't forget to follow me on Facebook and Twitter!


Friday, February 1, 2013

How to make: Creamy Cauliflower Soup


Over the holidays I picked up an exciting new cookbook that was just MADE for winter.  It's called "100 Best Fresh Soups".  Considering it was only about $6, I think I got my money's worth.  I attempted this soup in early January, and I was pleasantly surprised on how good it was!  I just happened to have some cauliflower to use, and this was the perfect way to use it up.  Also, Andy really liked it too, even though his initial reaction was something like this:

Andy:  "Ohh, you made soup?  Smells good, what kind?"
Laurie:  "Cauliflower"
Andy:  "ewww"
Laurie: "Just try it first!"

Gather your ingredients:

Creamy Cauliflower Soup

1 tbsp Olive Oil
2 tbsp Butter
1/2 cup diced onions
1 cup diced leeks
1 large head of cauliflower
4 cups vegetable or chicken stock
salt & pepper
Parmesean cheese and olive oil, for garnish

Start by dicing up all your veggies:

Cut the cauliflower into florets and cut the stalk into small pieces.

Chopped leeks and onion

Heat the olive oil and butter in a pan

Cook the leeks and onion for about 10 minutes, stirring frequently.

Here they are 10 minutes later!


Add the cauliflower.  Hmm... my pan's a little small.  Time to switch to the wok.

Saute the cauliflower with the other veggies for 2-3 minutes.

Add the stock and bring to a boil, cover, and simmer over medium heat for 20 minutes.


Here's the cooked veggies after 20 minutes!

Transfer to a food processor or blender, process until smooth, and return to rinsed-out saucepan.  If you have the smallest food processor ever, like me, just blend in batches.

Heat the soup through, and season to taste with salt and pepper.
 Feel free to add more stock to the consistency you want.

Finished!  Top with Parmesan cheese and drizzled olive oil.


If you liked this, let me know in the comments!  And don't forget to follow me on Facebook and Twitter!