Wednesday, June 26, 2013

The Bob Dylan Quilt Series: Cutting & Assembly


It's crafting Wednesday again!  Time to see how much progress I've made on the Bob Dylan T-Shirt Quilt.  If you haven't seen the first two installments, Set Up & Prep and Cutting & Interfacing, you might want to see how we got to this point.  Last week, I cut out the t-shirts and interfaced them.  This week I've cut out the complementary gray fabric, and started assembling the front of the quilt.  As always, when making a quilt, there needs to be some alterations in the original plan as you go.  First, there was a substitution in the shirts, as one shirt had a front and a back design that both fit a bit better in the design than another one.  I also had to alter the side pieces of the gray border fabric.  Here is an update of the plan:


Originally, I was going to have the sides be a continuous piece, 1" x 46" (and cut it 2" x 47" for seam allowance).  However, when I was cutting out my fabric which was only 42" wide, I made the executive decision to change the continuous piece to three pieces fit together.  This allowed easier cutting, and saved me a trip to the store to buy more gray fabric!  The notations of the gray fabric and what each should be cut is noted at the top of the plan.  Now I just had to get to it.

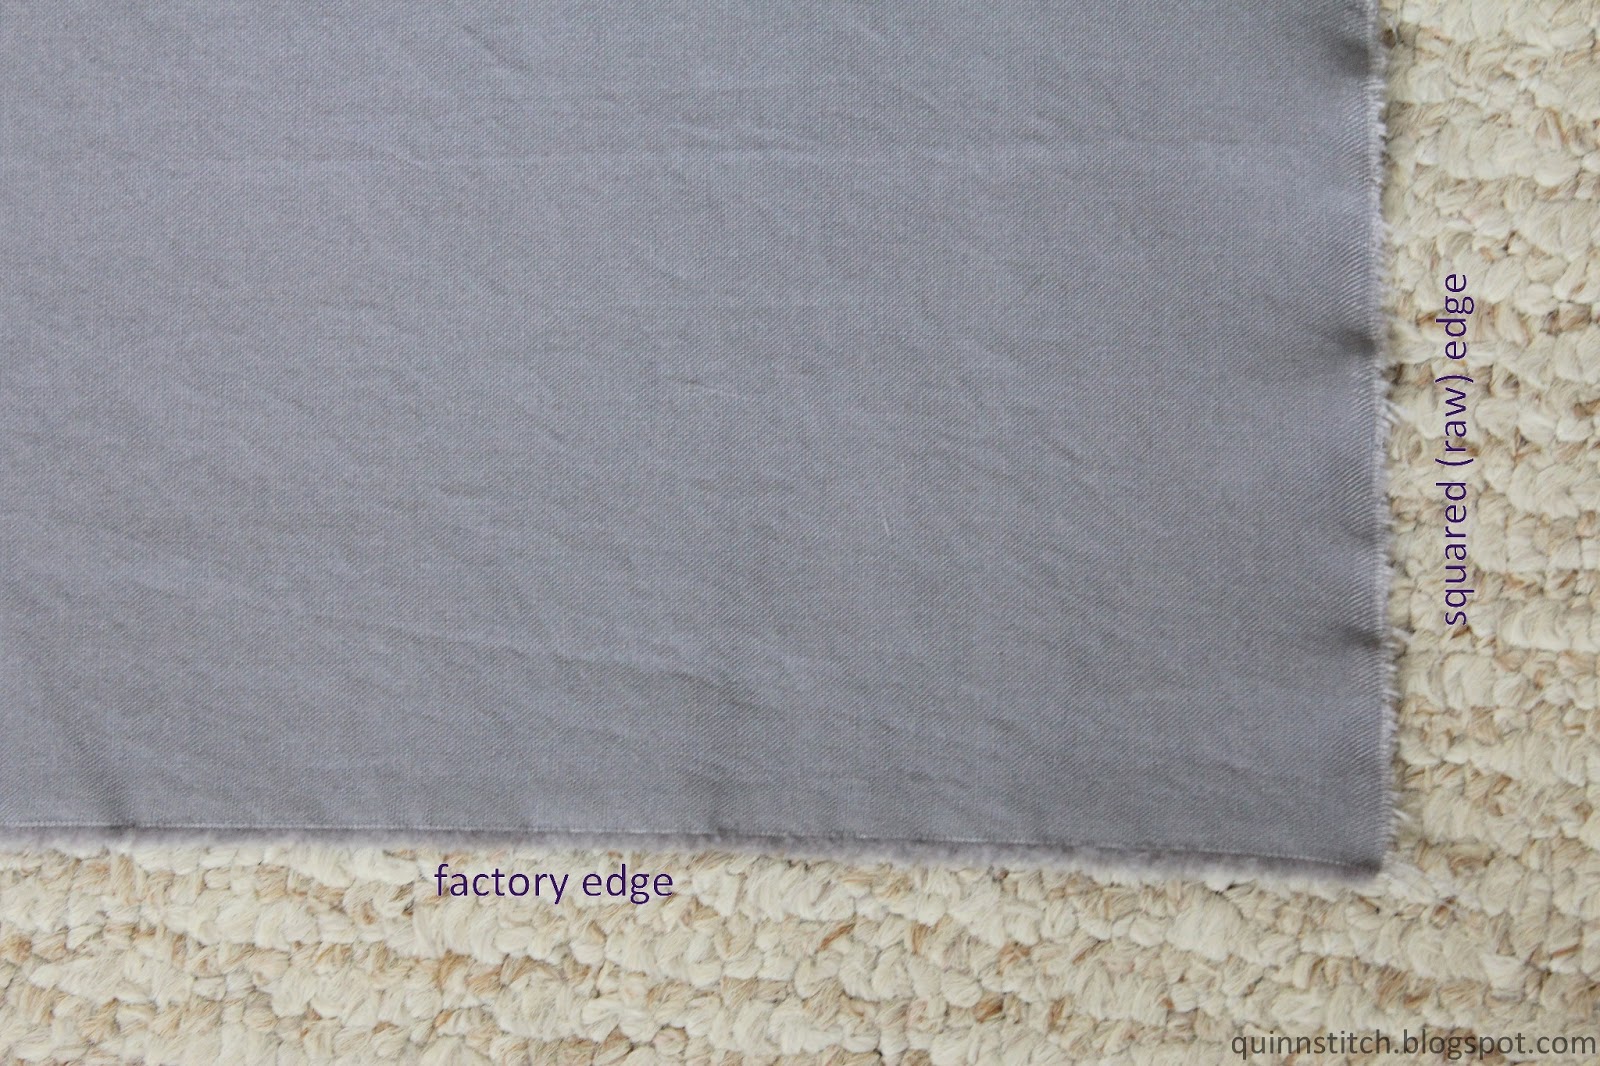
So here is my raw fabric.  I did iron this after pre-washing it, I promise!  Not to worry though, this will be ironed many more times, and it doesn't have to be perfect at this stage.  Also, please disregard the ugly carpet.  I said don't look at it!! :)  Now what we have here is fabric that has a factory woven edge (on the right) and the edge that was cut by the lady at Joann's (on the bottom).


We need to make completely sure that we have a right angle, not just by cutting it.  We want a right angle by the actual weave of the fabric.  There is a really easy way to do this.  Simply cut an inch or so into the factory  side of the fabric like so:


Now grab that little tab, and PULL!


Keep pulling!!!  Pull until the fabric until it reaches the other side.  Now, if the fabric peeters out before it gets to the other side, cut a new tab and pull.  You want to pull it until it gets completely to the other side.  This also shows how bad of an angle those fabric ladies actually cut!


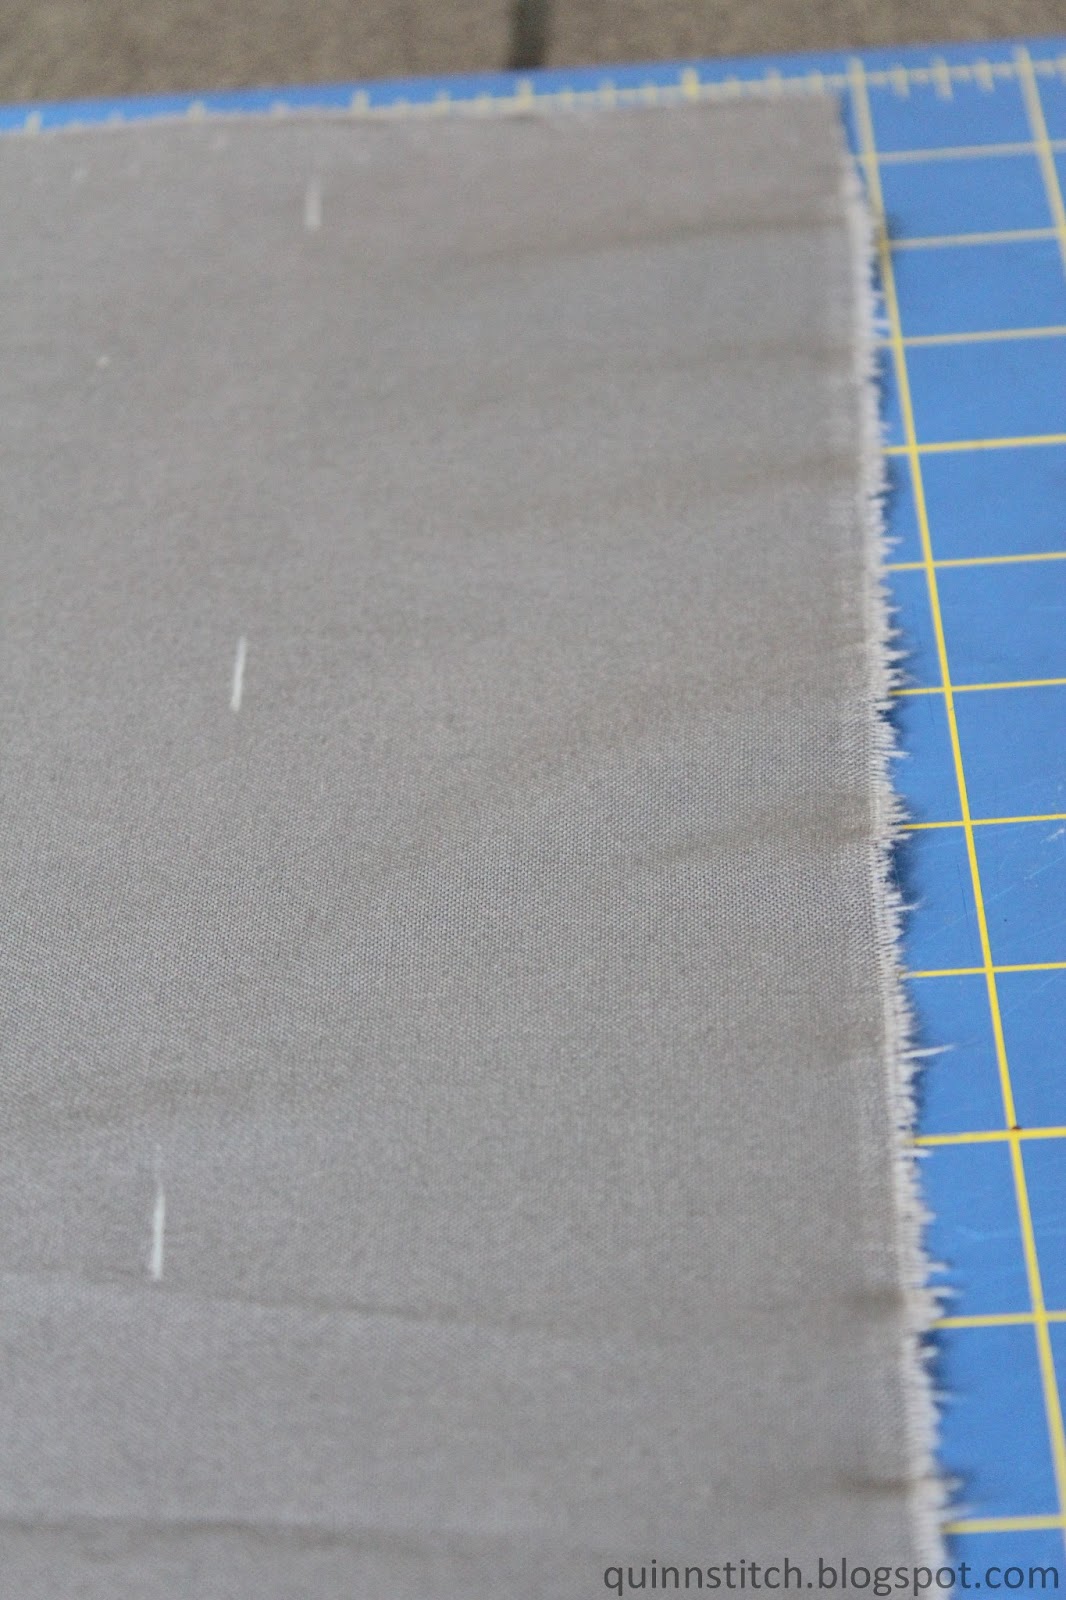
Here's a look at the fabric after I did this process.  I did have to cut mine a couple times to get it to pull the entire way across.  Your new raw edge is now squared and a perfect 90 degree angle with the factory edges on the other sides.  The new raw edge will have a little wave to it, and that goes away with the simple press of an iron.


Here's a close up of the edges after ironing.  I've rotated it as well.


Now it's time to cut!  I have my dimensions all planned out on my blueprint (above).  Below, I've started with the top and bottom pieces, measured 41" x 3".  Measuring with the new squared edge, I've made three inch marks to cut along.  Make sure to be as precise as possible with measuring and cutting.


I've cut out and labelled all my pieces.


Now I'm going to assemble the side pieces.  I need the final product to be 47" x 2".  Lay the right sides of the fabric together and sew 1/2 of an inch from the edge.  By precise measuring and cutting, and sewing with a 1/2 inch seam allowance, these pieces are perfectly 47" x 2".


Now simply iron down the seams like this.  You'll want to do this with all your seams as you go.


Here are all my pieces laid out, with the sides pre-assembled.


Now it's time to start assembling the rows.  Again, lay the right sides together, and pin the pieces that need to be connected.


Sew with a 1/2 inch seam allowance.


And iron down the seam when finished.  Don't worry if the gray fabric stretches a bit during sewing.  You can see that this happened to the piece I sewed in the picture below.  Simply trim the overlying gray fabric before moving on to sewing the next piece.


Here is the finished first row.  Quick measurements of the gray fabric between the t-shirt panels shows a (mostly) perfect 1" separation of gray fabric between the t-shirts.  Again, this is due to precise measuring, cutting, and sewing.


All three row are assembled!  Now to sew the 2" panel between the rows.  When doing this, be as precise as possible to line up the columns of the t-shirts together.  You can't do this with seams, as there is gray fabric between all the t-shirts.  After you pin, grab a ruler or straight edge and see if the seams somewhat line up along the columns.


Here's a look at what we've got now that the columns are assembled!  A (mostly) perfect 2" border between the rows.  Now onto the border.


One good thing about the seams that are now along the side pieces, is that we can use these seams to line up with the seams of the t-shirts and be SUPER precise!  When you are pinning two seams together, you want to pin the seams exactly where the two pieces meet on both sides.  You can see the front side here, with the pin directly in the seam:


And here's the other side, again, with the pin exactly in the seam!


By doing this, after sewing and pressing, your seam should look PERFECT, and everything should line up like this:


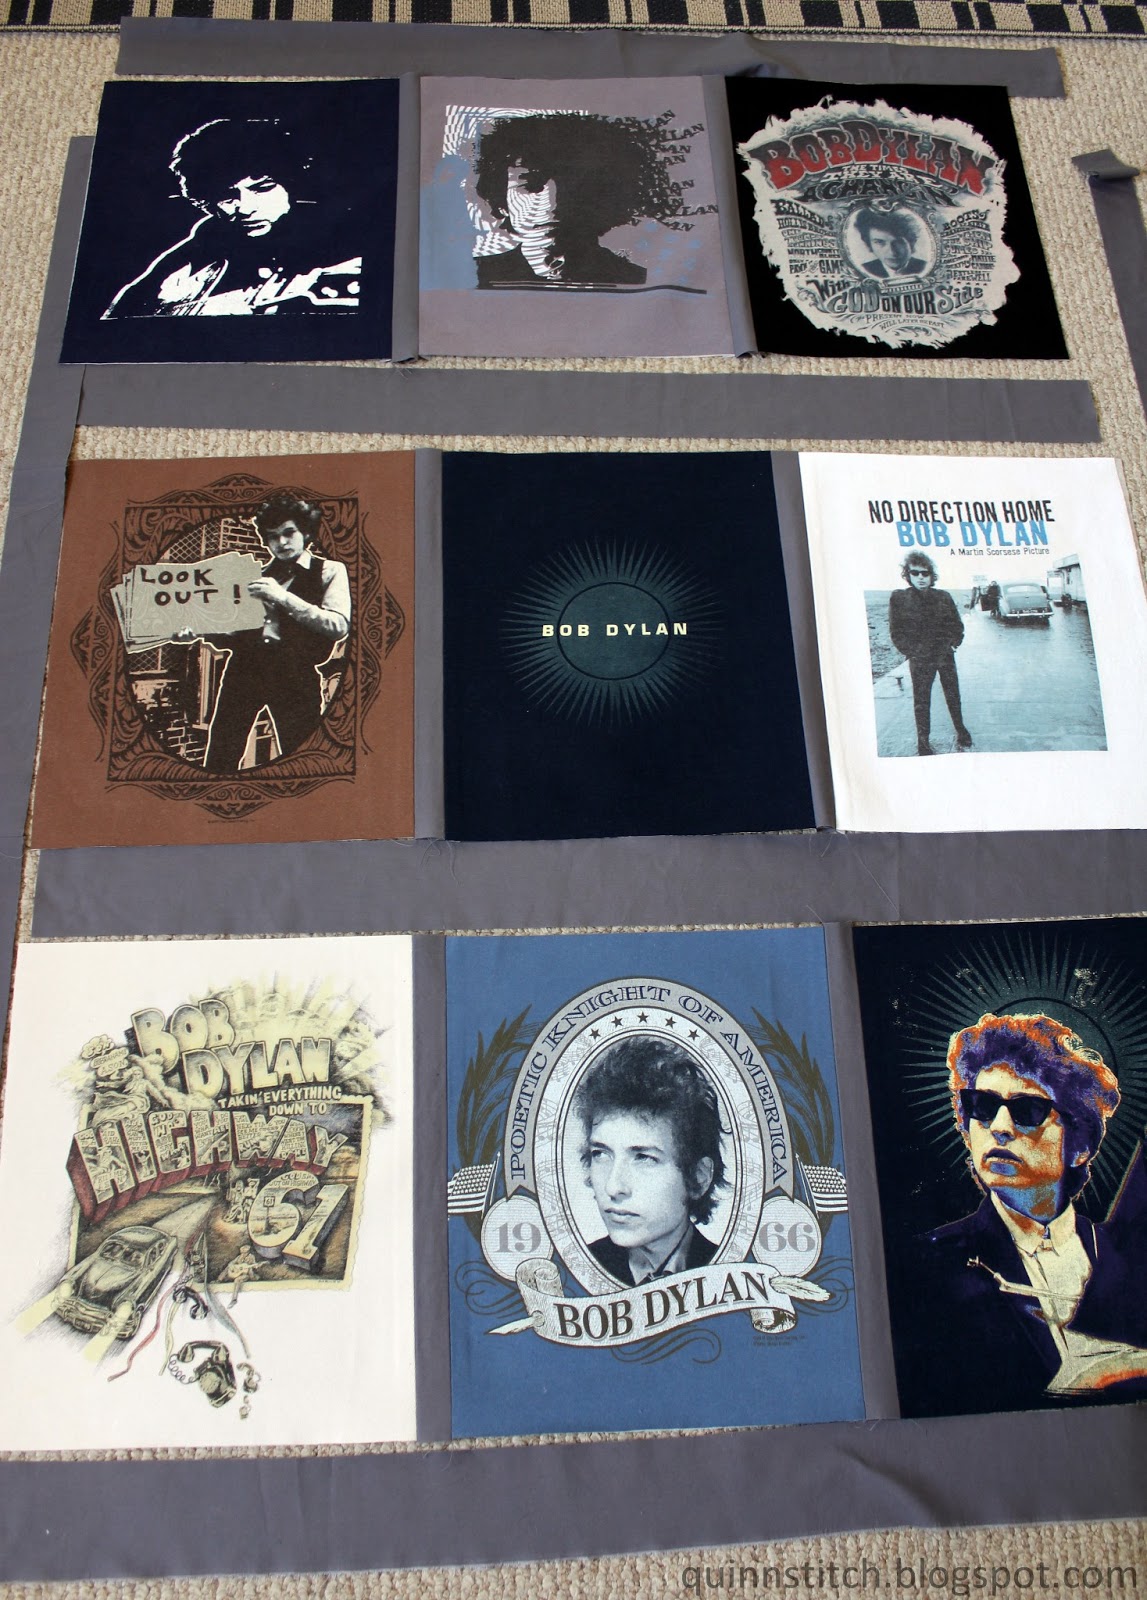
TA DAAAAA!  Here are all the front pieces, assembled!


Coming up this next week, I will be inserting the batting and constructing the border. So make sure to check back weekly on Wednesdays, I'll be posting updates about this project!  And as always, Thanks so much for visiting. I really appreciate everyone who reads and comments. If you like what you've seen here, please follow me on Facebook and Pinterest to receive updates.

facebook-like-me-button1         Follow Me on Pinterest

Tuesday, June 25, 2013

Vegan Tuesday: Grilled Pineapple & Avocado Corn Cakes


Hmm, what's for lunch today?  I had a random assortment of ingredients and leftovers which I was able to combine into this delicious meal for lunch!  This recipe also includes homemade "re-fried" beans, but you can substitute your favorite canned refried beans for this, if you're not in the mood to mess with homemade.  In addition, I did my grilling on my easy to use George Foreman grill.  I absolutely did not fire up my lil' smokey charcoal grill to grill a few pieces of pineapple!  Also, this is a variation of my previous recipe, straight up Avocado Corn Cakes.  Basically this recipe just begs to be experimented with!  :)

Grilled Pineapple & Avocado Corn Cakes

by quinnstitch.blogspot.com
yield: 10-14 corn cakes
[printable recipe]

Ingredients:
1 large avocado, cut into slices
1/2 of a fresh pineapple, cut into thin slices
1 can pinto beans (or refried beans)
10-12 corn cakes (refer to
chopped cilantro for garnish

For the corn cakes: (for visual directions, click here)
1 cup masa corn flour
1 tsp cumin
1 tsp garlic powder
1 tsp onion powder
1/2 tsp paprika
1/4 tsp salt
1 cup water
1-1 1/2 cups corn oil

For the refried beans:
1 can pinto beans, drained and rinsed
1 cup water
1/4 tsp salt
1/4 tsp pepper
1/2 tsp cumin
1/2 tsp onion powder
1/2 tsp garlic powder
the juice from 1 lime

Instructions:
Corn Cakes:
1. Heat corn oil in a pan to 350-375 degrees F.
2. Mix masa and spices together. Add the water and mix with a fork until combined.
3. Roll masa into 1 inch balls and flatten with hands. Add the corn cakes to the oil and cook for ~2-4 minutes per side. When finished, set on a paper towel to dry.
4. These can be made ahead of time and refrigerated. Reheat ~20 seconds in the microwave.

Refried beans
1. Mix beans, water, lime juice and spices in small saucepan. Bring to boil, then simmer uncovered until a good deal of the water is absorbed or has evaporated, about 10-15 minutes.
2. Mash with a potato masher or blend with a hand blender until the desired consistency.

Assemble
1. Grill the pineapple for about 5-7 minutes until hot.
2. Assemble the corn cakes, pineapple, sliced avocado, and refried beans.
3. Top with chopped cilantro. Enjoy immediately.


Thanks so much for visiting. I really appreciate everyone who reads and comments. If you like what you've seen here, please follow me on Facebook and Pinterest to receive updates.

facebook-like-me-button1         Follow Me on Pinterest


Monday, June 24, 2013

How to Make Coconut Milk (and How to Open a Coconut)


While perusing the grocery store recently, I made an impulse purchase.  A coconut.  Like a whole, unopened actual coconut.  They were just sitting there, they were only $1 apiece, and I thought, "Oh, why not!!"  Ok, so when getting a coconut home, the next thought that generally goes through your head is, "ummmmm, what do I do now?"  After some successes and failures, I now feel that I am able to bestow some of my knowledge of coconuts upon the world!  I will teach you how to open a coconut, extract the contents, make coconut milk and what you can do with the leftover pulp.

I grew interested in coconut milk in my attempt to find alternatives to regular milk for smoothies.  A few sources I read had listed the many benefits from coconut milk.  I knew you could buy it in cans in the store, but as anything like that, it's been processed and filled with preservatives.  Now that I had this whole coconut, it seemed like making my own coconut milk would be the obvious next step.

Homemade Coconut Milk

by quinnstitch.blogspot.com
yield: 1 to 2 cups

Materials
needlenose pliers
hammer
sharp knife
vegetable peeler or paring knife
blender
strainer or cheesecloth

Ingredients
1 coconut
1-2 cups hot water

Step 1:  Choosing a coconut at the store:  Give it a shake.  You want to hear the coconut water sloshing around to ensure it is fresh!


Step 2:  Drain the coconut water:  Take a look at the end of the coconut, seen below.  See those three "eyes"?  One of those things is your entry point.  One of them is going to be softer than the others.


Take your needle-nose pliers or screwdriver or whatever you've chosen to bore into this coconut, and poke around the eyes until you find the soft one.  THEN BURROW!


When you've created a hole big enough for the water to come out, drain the water into a cup.


This water is delicious, nutritious, and full of rehydrating electrolytes!  You know that fancy coconut water people buy?  ....ahem.  Yeah, it's basically this.  ANYWAY, you can drink it to make sure the coconut is fresh, or add it to the coconut milk we're going to make.  Your choice!!


Step 3:  Open the coconut:  I accomplished this with a towel, hammer and my hands holding them.  Others may want to wrap it in a towel and set the coconut on a concrete surface and give it a whack.  Seeing as I'd have to walk down three flights of stairs to reach a concrete sidewalk, and I didn't want to break the tiles of my kitchen floor, I did this by hand.  It took a good 15-20 swings of the hammer before the cracks started to show:


Couple more whacks will do it!  And there you go:


Step 4:  Begin extracting the coconut flesh by cutting into in with a sharp knife.  Watch your fingers though!


Step 5: After extracting the coconut flesh, now the papery brown covering needs to be removed.


I was able to get the papery covering off with a vegetable peeler.  This can also be done with a paring knife.


Give your coconut a rinse to get the rest of the husk off.


Step 5:  Blend:  I chopped the coconut into cubes and dropped them into my blender.  This one coconut gave me about 2 to 2 1/2 cups of raw coconut.


I boiled 2 cups of water and added it to the coconut.  The amount of water you add will change the texture of the coconut milk.  Less water = more creamy, more water = more milk, but a bit less creamy.  Blend until there is a nice smooth texture and all of the coconut is sufficiently blended.


Step 6:  Strain:  After blending, you need to strain out the milk from the pulp.  This is normally done with cheese cloth or a fine strainer.  I ran out of cheese cloth, but my regular strainer was sufficient to separate the pulp from the milk.  Squeeze as much liquid out of the pulp as you can.


And here is the finished product!  Aside from the coconut extraction process, making coconut milk takes less than five minutes, and couldn't be easier!


As you can see, I added 2 cups of hot water to the coconut, and I was able to yield almost as much milk from this process, about 2 cups.


When done, store in an airtight container and keep refrigerated.  I reused a spaghetti sauce jar to store mine in! :)


At this point, now you've got some extra coconut pulp.  Don't throw it away!  It's good to use too!  Use immediately in baking, or cooking (coconut shrimp, anyone?)  Or, alternatively, you can dehydrate the coconut for long-term use.  If you have a dehydrator, GOOD FOR YOU, because I don't.  What I do is spread the coconut pulp out on a baking sheet, and set it in my oven for a few hours.  My oven has constant ambient heat from the pilot light which leaves it at about 90-100 degrees, which is perfect for this process, and I don't have to turn the oven on.  If you have an oven that is able to be set at a low temperature, you can also do that.


I store my dehydrated coconut pulp in a leftover jelly jar for future baking!


If you have any questions, please let me know in the comments!  I truly appreciate everyone who reads and comments, and would love to hear from you!  If you like what you've seen here, please follow me on Facebook and Pinterest to receive updates.

facebook-like-me-button1         Follow Me on Pinterest