It's crafting Wednesday again! Time to see how much progress I've made on the Bob Dylan T-Shirt Quilt. If you haven't seen the first two installments, Set Up & Prep and Cutting & Interfacing, you might want to see how we got to this point. Last week, I cut out the t-shirts and interfaced them. This week I've cut out the complementary gray fabric, and started assembling the front of the quilt. As always, when making a quilt, there needs to be some alterations in the original plan as you go. First, there was a substitution in the shirts, as one shirt had a front and a back design that both fit a bit better in the design than another one. I also had to alter the side pieces of the gray border fabric. Here is an update of the plan:
So here is my raw fabric. I did iron this after pre-washing it, I promise! Not to worry though, this will be ironed many more times, and it doesn't have to be perfect at this stage. Also, please disregard the ugly carpet. I said don't look at it!! :) Now what we have here is fabric that has a factory woven edge (on the right) and the edge that was cut by the lady at Joann's (on the bottom).
We need to make completely sure that we have a right angle, not just by cutting it. We want a right angle by the actual weave of the fabric. There is a really easy way to do this. Simply cut an inch or so into the factory side of the fabric like so:
Now grab that little tab, and PULL!
Keep pulling!!! Pull until the fabric until it reaches the other side. Now, if the fabric peeters out before it gets to the other side, cut a new tab and pull. You want to pull it until it gets completely to the other side. This also shows how bad of an angle those fabric ladies actually cut!
Here's a look at the fabric after I did this process. I did have to cut mine a couple times to get it to pull the entire way across. Your new raw edge is now squared and a perfect 90 degree angle with the factory edges on the other sides. The new raw edge will have a little wave to it, and that goes away with the simple press of an iron.
Here's a close up of the edges after ironing. I've rotated it as well.
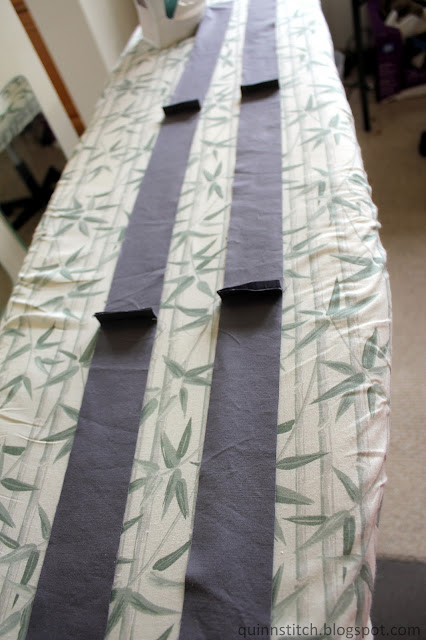
Now it's time to cut! I have my dimensions all planned out on my blueprint (above). Below, I've started with the top and bottom pieces, measured 41" x 3". Measuring with the new squared edge, I've made three inch marks to cut along. Make sure to be as precise as possible with measuring and cutting.
I've cut out and labelled all my pieces.
Now I'm going to assemble the side pieces. I need the final product to be 47" x 2". Lay the right sides of the fabric together and sew 1/2 of an inch from the edge. By precise measuring and cutting, and sewing with a 1/2 inch seam allowance, these pieces are perfectly 47" x 2".
Now simply iron down the seams like this. You'll want to do this with all your seams as you go.
Here are all my pieces laid out, with the sides pre-assembled.
Now it's time to start assembling the rows. Again, lay the right sides together, and pin the pieces that need to be connected.
Sew with a 1/2 inch seam allowance.
And iron down the seam when finished. Don't worry if the gray fabric stretches a bit during sewing. You can see that this happened to the piece I sewed in the picture below. Simply trim the overlying gray fabric before moving on to sewing the next piece.
Here is the finished first row. Quick measurements of the gray fabric between the t-shirt panels shows a (mostly) perfect 1" separation of gray fabric between the t-shirts. Again, this is due to precise measuring, cutting, and sewing.
All three row are assembled! Now to sew the 2" panel between the rows. When doing this, be as precise as possible to line up the columns of the t-shirts together. You can't do this with seams, as there is gray fabric between all the t-shirts. After you pin, grab a ruler or straight edge and see if the seams somewhat line up along the columns.
Here's a look at what we've got now that the columns are assembled! A (mostly) perfect 2" border between the rows. Now onto the border.
One good thing about the seams that are now along the side pieces, is that we can use these seams to line up with the seams of the t-shirts and be SUPER precise! When you are pinning two seams together, you want to pin the seams exactly where the two pieces meet on both sides. You can see the front side here, with the pin directly in the seam:
And here's the other side, again, with the pin exactly in the seam!
By doing this, after sewing and pressing, your seam should look PERFECT, and everything should line up like this:
TA DAAAAA! Here are all the front pieces, assembled!
Coming up this next week, I will be inserting the batting and constructing the border. So make sure to check back weekly on Wednesdays, I'll be posting updates about this project! And as always, Thanks so much for visiting. I really appreciate everyone who reads and comments. If you like what you've seen here, please follow me on Facebook and Pinterest to receive updates.


Laurie, "precise" should be your middle name! This looks perfect!!
ReplyDelete